
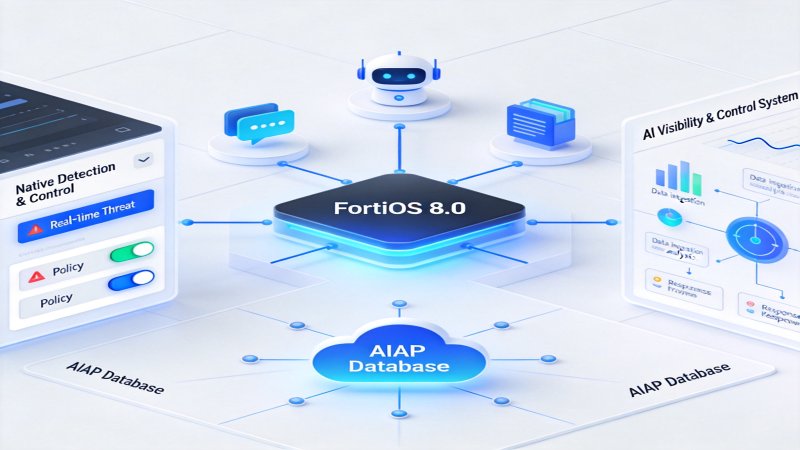
<h2>一、功能概述:FortiOS 8.0中GenAI检测的战略定位</h2><h3>1.1 功能背景与发布信息</h3><p>FortiOS 8.0作为Fortinet统一操作系统的最新主要版本,在网络安全领域引入了针对生成式AI(Generative AI,简称GenAI)应用的原生检测与管控能力。根据Fortinet官方文档记载,FortiOS 8.0.0版本的新功能说明中明确指出:</p><blockquote><p>"Application control support has been added for generative AI to enhance the management and categorization of generative AI signatures. This offers improved visibility and insights into AI-related activities."<br><strong>来源:</strong> FortiOS 8.0.0 New Features - Application control support for generative AI</p></blockquote><p>这一功能的引入,标志着Fortinet正式将生成式AI应用的安全管控纳入其核心安全架构体系。随着ChatGPT、Claude、Gemini等AI服务在企业环境中的广泛采用,如何在保障业务效率的同时有效管控AI工具的使用,已成为安全团队面临的关键挑战。FortiOS 8.0的GenAI检测功能正是为解决这一挑战而设计。</p><h3>1.2 核心功能组件</h3><p>FortiOS 8.0中的GenAI检测功能包含以下核心组件,这些组件共同构成了完整的AI可见性与控制体系:</p><p><strong>AIAP数据库类型支持。</strong> FortiOS 8.0引入了全新的AIAP(AI Application Protection)数据库类型,专门用于生成式AI规则的签名匹配。该数据库由FortiGuard Labs持续维护,包含对主流AI应用的精确识别签名。</p><p><strong>GenAI专用日志字段。</strong> 系统在UTM应用控制日志中新增了六个专用字段,用于记录AI交互的关键元数据。这些字段覆盖了从用户身份到提示词内容的完整信息链路。</p><p><strong>专用应用类别。</strong> 在Security Profiles > Application Signatures中新增了"Generative AI"应用类别,CLI中标识为category 36,便于管理员进行批量策略配置。</p><p><strong>FortiView AI专用组件。</strong> 新增两个FortiView仪表板组件——AI Applications和AI Use Cases,用于实时可视化AI流量态势。</p><h3>1.3 功能定位与价值主张</h3><p>从企业网络安全的角度来看,FortiOS 8.0 GenAI检测功能的核心价值主张体现在三个维度:</p><p><strong>第一,Shadow AI发现与可见性。</strong> 通过网络层检测识别员工使用的各类AI工具,帮助安全团队了解未经批准的AI使用情况,即Shadow AI(影子AI)现象。</p><p><strong>第二,数据泄露风险可视化。</strong> 通过提取AI交互元数据(包括目标数据中心地理位置、用户账户、提示词内容等),帮助安全团队评估通过AI渠道可能发生的数据泄露风险。</p><p><strong>第三,合规审计支撑。</strong> 完整的日志记录和FortiView可视化报表为满足日益严格的AI监管要求提供技术证据,支持合规性审计需求。</p><h2>二、技术架构:FortiOS 8.0的实现方式</h2><h3>2.1 AIAP数据库架构</h3><p>AIAP(AI Application Protection)数据库是FortiOS 8.0 GenAI检测功能的核心引擎。根据官方文档,AIAP数据库具有以下技术特征:</p><p><strong>数据库类型与更新机制。</strong> AIAP是一种独立的数据库类型,通过FortiGuard Distribution Network(FDN)进行更新。与传统的应用签名库类似,AIAP数据库采用签名匹配的方式识别AI应用流量。数据库的版本状态可以通过以下CLI命令验证:</p><p># diagnose autoupdate versions | grep -A 6 GenAI
GenAI Application Definitions
Version: 33.00033 signed
Contract Expiry Date: Thu Jan 3 2030
Last Updated using scheduled update on Tue Jun 24 20:59:43 2025
Last Update Attempt: Tue Jun 24 23:10:03 2025
Result: No Updates</p><p><strong>数据库更新的前置条件。</strong> 官方文档明确指出,AIAP数据库更新的前置条件包括:</p><ul><li>设备必须拥有有效的FMWR(FortiCare Maintenance & Warranty Renewals)合同</li><li>至少有一条防火墙策略启用了Application Control配置文件</li><li>FortiGate能够正常连接FortiGuard服务器</li></ul><p><strong>CLI类别标识。</strong> Generative AI应用类别在CLI中的标识为category 36,这一数值在配置应用控制条目时使用。</p><h3>2.2 SSL深度检测依赖架构</h3><p>由于主流AI服务均通过HTTPS提供访问(使用TLS 1.2/1.3加密),FortiOS 8.0的GenAI检测能力高度依赖于SSL深度检测(Deep Inspection)功能。这一架构设计体现了Fortinet在加密流量检测领域的核心技术能力。</p><p><strong>中间人解密原理。</strong> SSL深度检测的工作原理是在客户端与服务器之间建立双向TLS连接。FortiGate终止客户端的TLS连接,同时作为客户端与目标服务器建立新的TLS连接,在两者之间进行数据转发和内容检测。这一过程对最终用户透明。</p><p><strong>与GenAI检测的关联。</strong> 根据官方文档说明,Extended UTM日志(包含aiuser、model、prompt等GenAI专用字段)的完整捕获需要启用SSL深度检测。部分GenAI签名明确标注需要SSL深度Inspection才能正常工作,这些信息可以通过签名详情页面的"Requirements"字段查看。</p><p><strong>检测模式选择。</strong> FortiOS 8.0支持两种SSL检测模式:</p><figure class="table">
| 检测模式 | 说明 | GenAI检测能力 |
|---|---|---|
| Certificate Inspection | 仅检查证书信息,不解密内容 | 仅能识别目标服务器,无法提取AI元数据 |
| Full SSL Inspection (Deep Inspection) | 完整解密并检测内容 | 完整支持AI应用识别和元数据提取 |
| CLI日志字段 | GUI字段名 | 数据含义 | 示例值 |
|---|---|---|---|
| aiuser | AI User | AI应用用户账户 | user@company.com |
| model | Model | AI模型标识 | gpt-4、claude-3 |
| dcgeo | Data Center's Geographical Location | 数据中心地理区域 | US、EU、CN |
| usecase | Use Case | AI使用场景分类 | Conversational_Assistant |
| prompt | Prompt | 用户提示词内容 | (实际输入内容) |
| cloudgenai | Generate AI Application | 聚合的应用信息 | 包含多维度的JSON结构 |
logid="1059028704" type="utm" subtype="app-ctrl"
eventtype="signature" level="information" vd="vd1"
appid=53323 srcip=10.1.100.126 dstip=110.18.32.47
srcport=59001 dstport=443 service="HTTPS"
direction="incoming" policyid=1 sessionid=1299
applist="GenAI" action="pass"
appcat="GenAI" app="OpenAI.ChatGPT_Post"
msg="GenAI: OpenAI.ChatGPT_Post"
usecase="Conversational_Assistant"
aiuser="fftntt@gmail.com"
model="auto"
dcgeo="US"
prompt="generate test log for appctrl"
cloudgenai="APP=OpenAI.ChatGPT, DCGEO=US,
UseCase=Conversational_Assistant,
User=fftntt@gmail.com,
UserOrganization=org-F2ZasxjlplRvKPgeVfbXbPeM,
HistoryTraining=true, Model=auto,
Title='AppCtrl Test Log',
Prompt='generate test log for appctrl'"
apprisk="low"</p><p>从这条日志可以提取以下关键信息:</p><ul><li>用户身份:fftntt@gmail.com</li><li>AI服务:OpenAI ChatGPT</li><li>AI模型:auto(自动选择)</li><li>数据中心位置:美国(US)</li><li>使用场景:对话助手</li><li>提示词内容:generate test log for appctrl</li><li>对话历史训练状态:HistoryTraining=true</li></ul><h2>三、部署指南:FortiOS 8.0设备操作步骤</h2><h3>3.1 前置条件验证</h3><p>在部署GenAI检测功能之前,需要在FortiOS 8.0设备上完成以下前置条件验证。这些验证步骤确保设备具备正常运行GenAI检测功能的基础环境。</p><p><strong>步骤一:确认固件版本。</strong></p><p>登录FortiOS 8.0设备管理界面,执行以下命令确认固件版本:</p><p># get system status</p><p>确保设备运行的是FortiOS 8.0.0或更高版本。</p><p><strong>步骤二:验证订阅状态。</strong></p><p>进入System > FortiGuard页面,或执行以下CLI命令验证订阅状态:</p><p># diagnose fortiguard upd-status</p><p>确认以下订阅处于激活状态:</p><ul><li>FortiCare Maintenance & Warranty Renewals (FMWR)</li><li>Application Control服务</li></ul><p><strong>步骤三:验证FortiGuard连接。</strong></p><p># execute ping update.fortiguard.net
execute ping service.fortiguard.net</p><p>确保设备能够正常解析并访问FortiGuard服务器。</p><h3>3.2 终端CA证书部署</h3><p>启用SSL深度检测后,终端设备需要信任FortiGate用于重签名的CA证书,否则用户会遇到证书警告。以下是不同操作系统环境下的证书部署步骤。</p><p><strong>Windows系统证书安装步骤:</strong></p><ol><li>登录FortiGate管理界面</li><li>进入Security Profiles > SSL/SSH Inspection</li><li>编辑使用的SSL检测配置文件(系统内置的deep-inspection或自定义配置文件)</li><li>点击CA证书旁的"Download"按钮下载证书</li><li>在Windows客户端双击下载的证书文件</li><li>选择"本地计算机"作为存储位置</li><li>将证书放入"受信任的根证书颁发机构"存储</li><li>完成证书导入向导</li></ol><p><strong>macOS系统证书安装步骤:</strong></p><ol><li>下载Fortinet_CA_SSL证书文件</li><li>在macOS上打开"钥匙串访问"应用</li><li>选择"系统"钥匙串</li><li>通过"文件 > 导入项目"导入证书</li><li>双击导入的证书,展开"信任"选项</li><li>将"使用此证书时"设置为"始终信任"</li></ol><p><strong>Firefox浏览器特殊配置。</strong></p><p>Firefox使用独立的证书存储,不依赖系统证书存储。在Firefox中需要额外配置:</p><ol><li>打开Firefox设置</li><li>进入"隐私与安全"页面</li><li>在"证书"部分勾选"允许Firefox自动信任您安装的第三方证书"</li></ol><h3>3.3 Application Control配置文件创建</h3><p><strong>通过GUI创建GenAI监控配置文件:</strong></p><ol><li>进入Security Profiles > Application Control页面</li><li>点击"Create New"按钮创建新配置文件</li><li>输入配置文件名称(如"GenAI_Monitor")</li><li>在应用类别列表中找到"Generative AI"类别</li><li>将该类别的动作设置为"Monitor"</li><li>根据需要配置其他参数</li><li>点击"OK"保存配置文件</li></ol><h3>3.4 SSL检测配置文件配置</h3><p><strong>创建启用深度检测的SSL/SSH配置文件:</strong></p><ol><li>进入Security Profiles > SSL/SSH Inspection页面</li><li>点击"Create New"创建新配置文件</li><li>配置以下参数:<ul><li>Name:输入配置文件名称(如"new-deep-inspection")</li><li>SSL Inspection Options > Inspection method:选择"Full SSL Inspection"</li><li>CA certificate:选择用于重签名的CA证书</li></ul></li><li>在Protocol Port Mapping中确保HTTPS(443端口)已启用深度检测</li><li>点击"OK"保存</li></ol><p><strong>CLI方式创建SSL检测配置文件:</strong></p><p>config firewall ssl-ssh-profile
edit "new-deep-inspection"
config https
set ports 443
set status deep-inspection
end
set caname "Fortinet_CA_SSL"
next
end</p><h3>3.5 防火墙策略配置</h3><p>将Application Control配置文件和SSL检测配置文件关联到防火墙策略:</p><p><strong>通过GUI配置防火墙策略:</strong></p><ol><li>进入Policy & Objects > Firewall Policy页面</li><li>点击"Create New"创建新策略</li><li>配置基础参数:<ul><li>Name:策略名称</li><li>Incoming Interface:源接口(如port2)</li><li>Outgoing Interface:目的接口(如port1)</li><li>Source:源地址对象</li><li>Destination:目的地址对象</li><li>Schedule:计划时间</li><li>Service:服务类型(通常选择ALL)</li></ul></li><li>在Security Profiles部分:<ul><li>启用Application Control,选择前面创建的GenAI配置文件</li><li>设置SSL Inspection为启用了深度检测的配置文件</li></ul></li><li>启用UTM status</li><li>根据需要启用NAT</li><li>点击"OK"保存策略</li></ol><h3>3.6 FortiView AI组件配置</h3><p><strong>添加FortiView AI Applications组件:</strong></p><ol><li>进入Dashboard > Status页面</li><li>点击"Add Widget"按钮</li><li>在组件列表中选择"FortiView AI Applications"</li><li>配置组件参数(名称、数据刷新间隔等)</li><li>点击"OK"添加组件</li></ol><p><strong>添加FortiView AI Use Cases组件:</strong></p><p>重复上述步骤,在组件列表中选择"FortiView AI Use Cases"。</p><h3>3.7 部署验证</h3><p>完成以上配置后,需要进行功能验证以确保GenAI检测正常工作。</p><p><strong>步骤一:触发测试流量。</strong></p><p>在已安装CA证书的客户端PC上:</p><ol><li>打开浏览器访问www.chatgpt.com</li><li>登录AI服务账户</li><li>输入测试提示词(如"Hello, this is a test")</li></ol><p><strong>步骤二:检查日志生成。</strong></p><p>通过GUI查看:Log & Report > Security Events > Application Control</p><p>通过CLI查看:</p><p># execute log display | grep -i "GenAI"</p><p><strong>步骤三:验证日志内容。</strong></p><p>确认日志包含以下GenAI字段:</p><ul><li>appcat="GenAI"</li><li>app="OpenAI.ChatGPT_Post"</li><li>aiuser、model、dcgeo、usecase等字段有值</li></ul><p><strong>步骤四:验证AIAP数据库更新。</strong></p><p># diagnose autoupdate versions | grep -A 6 GenAI</p><p>确认AIAP数据库版本号非零(如Version: 33.00033)。</p><h2>四、配置详解:FortiOS 8.0 CLI命令参考</h2><h3>4.1 Application Control配置文件CLI配置</h3><p><strong>基础GenAI监控配置(CLI):</strong></p><p>config application list
edit "GenAI"
config entries
edit 1
set category 36
set action pass
next
end
next
end</p><p><strong>配置说明:</strong></p><ul><li>
category 36:指定Generative AI应用类别</li><li>action pass:设置动作为放行(仅记录)</li></ul><p><strong>Monitor模式配置:</strong></p><p>如果需要在记录日志的同时生成UTM告警事件,应将action设置为monitor:</p><p>config application list
edit "GenAI_Monitor"
config entries
edit 1
set category 36
set action monitor
next
end
next
end</p><p><strong>Block模式配置:</strong></p><p>如果需要阻断所有GenAI流量:</p><p>config application list
edit "GenAI_Block"
config entries
edit 1
set category 36
set action block
next
end
next
end</p><h3>4.2 防火墙策略CLI配置</h3><p><strong>关联Application Control和SSL检测配置到策略:</strong></p><p>config firewall policy
edit 1
set name "GenAI_Inspection_Policy"
set srcintf "port2"
set dstintf "port1"
set action accept
set srcaddr "all"
set dstaddr "all"
set schedule "always"
set service "ALL"
set utm-status enable
set ssl-ssh-profile "new-deep-inspection"
set application-list "GenAI"
set nat enable
next
end</p><p><strong>关键参数说明:</strong></p><ul><li>
utm-status enable:启用UTM功能</li><li>ssl-ssh-profile "new-deep-inspection":关联深度检测配置文件</li><li>application-list "GenAI":关联应用控制配置文件</li></ul><h3>4.3 SSL/SSH检测配置文件CLI配置</h3><p><strong>创建深度检测配置文件:</strong></p><p>config firewall ssl-ssh-profile
edit "new-deep-inspection"
config https
set ports 443
set status deep-inspection
end
config ftps
set ports 990
set status deep-inspection
end
config imaps
set ports 993
set status deep-inspection
end
config pop3s
set ports 995
set status deep-inspection
end
config smtps
set ports 465
set status deep-inspection
end
set caname "Fortinet_CA_SSL"
next
end</p><h3>4.4 显式代理环境配置</h3><p>在启用显式代理(Explicit Proxy)的环境中使用GenAI检测时,需要禁用内联IPS:</p><p>config ips settings
set proxy-inline-ips disable
end</p><h3>4.5 数据库状态查询命令</h3><p><strong>查询AIAP数据库版本:</strong></p><p># diagnose autoupdate versions | grep -A 6 GenAI</p><p><strong>预期输出格式:</strong></p><p>GenAI Application Definitions
Version: XX.XXXXXX signed
Contract Expiry Date: [日期]
Last Updated using scheduled update on [日期]
Last Update Attempt: [日期]
Result: No Updates / Update succeeded</p><p><strong>异常情况诊断:</strong></p><p>如果显示"Version: 0.00000",表明AIAP数据库尚未更新,可能的原因包括:</p><ul><li>没有防火墙策略启用Application Control</li><li>FMWR订阅已过期</li><li>FortiGate无法连接FortiGuard服务器</li></ul><h2>五、业务流程:FortiOS 8.0系统处理流程</h2><h3>5.1 流量识别与策略匹配流程</h3><p>当用户通过FortiOS 8.0设备访问AI服务时,系统按以下流程处理流量:</p><p><strong>阶段一:连接建立与策略匹配。</strong></p><ol><li>客户端发起对AI服务(如chat.openai.com)的HTTPS连接请求</li><li>FortiGate接收到达流量包</li><li>防火墙引擎查询策略表,执行策略匹配</li><li>找到匹配策略后,检查是否启用了SSL/SSH检测和UTM功能</li><li>如果启用深度检测,进入SSL解密流程</li></ol><p><strong>阶段二:SSL深度检测流程。</strong></p><ol><li>FortiGate伪装成目标服务器,使用本地CA证书生成伪造证书</li><li>客户端与FortiGate建立TLS连接(前端连接)</li><li>FortiGate同时作为客户端与真实AI服务器建立TLS连接(后端连接)</li><li>FortiGate在两个TLS连接之间进行数据转发</li><li>流量在FortiGate内部被解密为明文</li></ol><p><strong>阶段三:应用层检测与签名匹配。</strong></p><ol><li>IPS引擎的协议解码器分析解密后的HTTP请求</li><li>应用识别模块查询AIAP数据库</li><li>执行签名模式匹配,识别AI应用类型</li><li>如果匹配成功,提取GenAI相关元数据</li><li>根据配置文件设置执行策略动作</li></ol><p><strong>阶段四:响应生成与数据转发。</strong></p><ol><li>生成包含GenAI字段的应用控制日志</li><li>根据动作设置决定流量处理方式:<ul><li>Monitor/Pass:转发解密后的流量</li><li>Block:终止连接,返回替换页面</li></ul></li><li>重新加密流量并转发至目标接收方</li></ol><h3>5.2 日志生成与上报流程</h3><p><strong>本地日志生成。</strong></p><p>FortiGate在检测到GenAI流量后,会自动生成UTM应用控制日志,包含完整的GenAI元数据字段。日志存储于设备本地磁盘,可通过以下方式查看:</p><ul><li>GUI:Log & Report > Security Events</li><li>CLI:execute log display</li></ul><p><strong>FortiAnalyzer上报。</strong></p><p>如果FortiGate配置了FortiAnalyzer日志上报,日志会同步发送至FortiAnalyzer进行集中存储和分析。在FortiAnalyzer上可以:</p><ul><li>查看跨设备的AI流量聚合数据</li><li>生成周期性AI使用报告</li><li>配置基于GenAI字段的告警规则</li></ul><p><strong>FortiView实时聚合。</strong></p><p>FortiView模块会实时聚合GenAI日志数据,在仪表板上展示:</p><ul><li>AI Applications组件:按AI应用分类的流量排名</li><li>AI Use Cases组件:按使用场景分类的流量排名</li></ul><h2>六、授权购买:FortiOS 8.0许可要求</h2><h3>6.1 FortiGuard订阅服务体系</h3><p>FortiOS 8.0的GenAI检测功能依赖Fortinet的FortiGuard订阅服务体系。根据官方文档和相关产品资料,该功能需要以下类型的订阅授权:</p><p><strong>FMWR(FortiCare Maintenance & Warranty Renewals)。</strong></p><p>FMWR是FortiGate设备的基础维护合同,主要功能包括:</p><ul><li>固件版本升级权限</li><li>技术支持服务</li><li>FortiGuard数据库更新权限</li></ul><p>根据官方说明,AIAP数据库更新需要有效的FMWR合同。</p><p><strong>Application Control服务。</strong></p><p>Application Control是包含在多个FortiGuard安全套餐中的安全服务之一:</p><ul><li>UTP(Unified Threat Protection)Bundle</li><li>Enterprise Protection Bundle</li><li>Advanced Threat Protection (ATP) Bundle</li></ul><h3>6.2 订阅套餐对比</h3><p>根据Fortinet官方产品资料和授权指南,各订阅套餐的功能覆盖如下:</p><figure class="table">
| 套餐名称 | 包含Application Control | 包含DLP | 包含AI安全功能 | 适用场景 |
|---|---|---|---|---|
| FortiCare基础合同 | ❌ | ❌ | ❌ | 仅基础支持 |
| UTP Bundle | ✅ | ❌ | ❌ | 中小企业基础防护 |
| ATP Bundle | ✅ | ❌ | 部分 | 高级威胁防护 |
| Enterprise Protection | ✅ | ✅ | ✅ | 大型企业全面防护 |
| 功能 | 到期后状态 |
|---|---|
| 固件升级 | 阻止升级至新版本 |
| FortiGuard更新 | 停止更新 |
| AIAP数据库 | 停止更新(已下载版本仍可用) |
| 功能 | 到期后状态 |
|---|---|
| 新签名下载 | 停止 |
| 已部署检测 | 继续工作(使用最后下载的签名) |
| 新AI应用识别 | 无法识别 |
战略重要性
FortiOS 8.0的GenAI检测功能为企业提供了完整的AI可见性与控制体系,是应对Shadow AI和数据泄露风险的关键技术手段,满足了企业对AI工具管控的迫切需求。
决策选择
对于使用FortiGate的企业,建议优先在Monitor模式下部署GenAI检测功能,建立AI使用基线后再逐步过渡到更严格的管控策略,同时需要评估SSL深度检测的部署成本和终端证书分发难度。
预测验证
未来GenAI检测可能会与DLP深度联动,实现对AI交互内容的敏感信息检测,同时可能引入AI驱动的签名生成能力,实现对新兴AI应用的快速识别。
觉得这篇分析有用?
每周收到3-5条AI基础设施关键信号 →
💬 评论 (0)